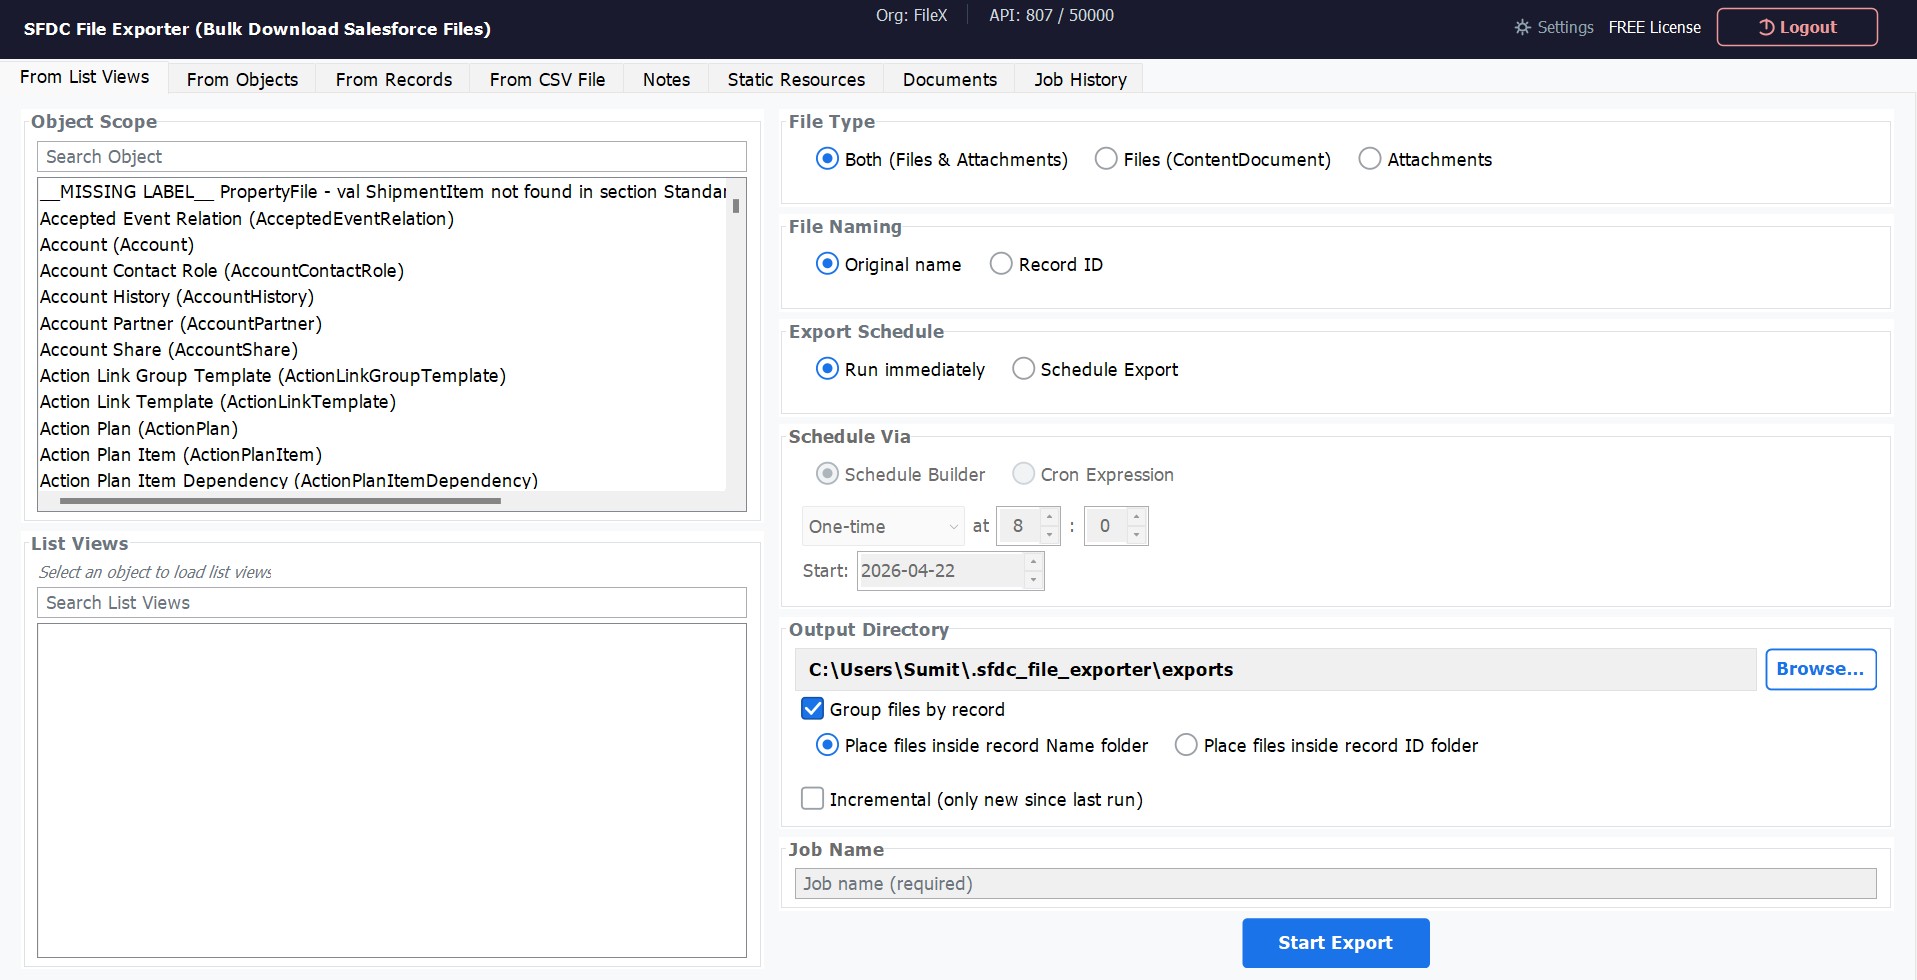
Export from List Views
This export method lets you target files associated with records in a specific Salesforce List View. Select an object, pick a list view, and export all files linked to every record in that view — in one operation. It is the fastest way to bulk-download files when your target set of records is already defined as a list view in Salesforce.
How to Use
Select Export Type
In the sidebar or main menu, choose Export from List View.
Choose a Salesforce Object
Select the object whose list views you want to browse — for example, Account, Contact, Opportunity, or any custom object in your org.
Select a List View
The app loads all list views defined for the chosen object. Select the list view that targets the records you need. Each list view is shown exactly as it appears in Salesforce.
Choose File Type
Select Files (ContentDocument), Attachments, or both. Files are the modern Salesforce storage type; Attachments are the legacy type found on older records.
Choose File Naming
Select whether to save exported files using their original file name or named after the parent Record ID. See File Naming Options below for guidance on which to use.
Set Output Folder & Export
Click Browse to select your destination folder, then click Export. A real-time progress bar shows files downloaded, files remaining, and any errors encountered.
File Naming Options
When exporting, you control how each downloaded file is named on disk. SFDC File Exporter offers two options to suit different workflows — one that keeps the original file names recognizable, and one that makes each file uniquely traceable back to its Salesforce parent record.
Original File Name
The file is saved exactly as it was named in Salesforce — the same name a user would see when opening the record's Files related list. This is the most human-readable option and the best choice when the file names themselves carry meaning (for example, Invoice_March_2024.pdf or Contract_Signed.docx).
output-folder / Invoice_March_2024.pdfParent Record ID
The file is renamed using the Salesforce ID of the parent record it is attached to. This guarantees a unique, unambiguous file name even when multiple records have attachments with identical names (for example, two records each with a file named photo.jpg). Useful for automated pipelines or archival workflows where traceability matters more than readability.
output-folder / 001XXXXXXXXXXXXXXX_photo.jpgChoosing the Right Option
| Situation | Recommended Option |
|---|---|
| Files have descriptive, unique names and you want them easy to browse | Original File Name |
Multiple records may share the same file name (e.g., photo.jpg, document.pdf) |
Parent Record ID |
| You need to trace each file back to a specific Salesforce record later | Parent Record ID |
| Exporting for human review, sharing, or archiving where names must be readable | Original File Name |
| Feeding files into an automated processing pipeline | Parent Record ID |