Minimum System Requirements
| Component | Windows (v6) | macOS (v7) |
|---|---|---|
| Operating System | Windows 10 / 11 | macOS 10.14+ |
| Runtime | Included in installer | Java JRE 8 or above |
| Internet | Required (Salesforce API access) | |
| Salesforce Edition | Professional and above (API access required) | |
| RAM | 2 GB minimum recommended | |
How to Install SFDC File Exporter
Download the application
Go to the old version download page and click Download SFDC File Exporter to download the installer.
Extract the zip file and run the setup
Extract the downloaded zip file and run the setup file.
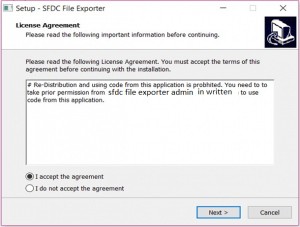
Choose the installation directory
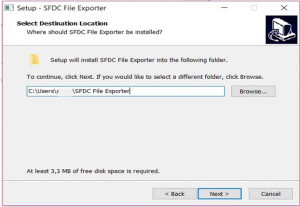
Click Next. Choose the directory where you want to install SFDC File Exporter. We strongly recommend installing in your user directory.
Create a desktop shortcut (optional)
Click Next. Select the checkbox if you want to create a desktop shortcut.
Review installation summary
Review the cumulative information showing where SFDC File Exporter will be installed.
Complete the installation
Click Install to complete the installation.
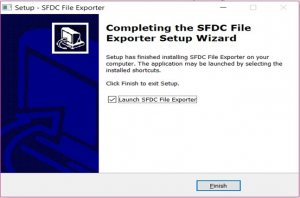
Congratulations! You have successfully installed SFDC File Exporter on your system.
Generate & Activate Product Key
A product key is required to use SFDC File Exporter v6/v7 beyond the trial period.
Generate your product key
Go to Generate Product Key, enter your email address, and click the button. Your key will arrive in your inbox within seconds.
Open Settings in the app
Launch SFDC File Exporter and navigate to Settings → Activate Product Key.
Paste and activate
Copy the key from your email, paste it into the activation field, and click Activate. The application will confirm successful activation.
Logging In to Salesforce
On the SFDC File Exporter login screen, enter your credentials and click Sign In.
- Username — your Salesforce login username
- Password — your Salesforce password
- Security Token — required if your IP is not whitelisted. See how to generate your security token.
- Environment — choose Production or Sandbox
Extract Files Using SOQL Query
Select "Export Files from Salesforce"
After validating the product key successfully, the following window will open. Click Export files from Salesforce.
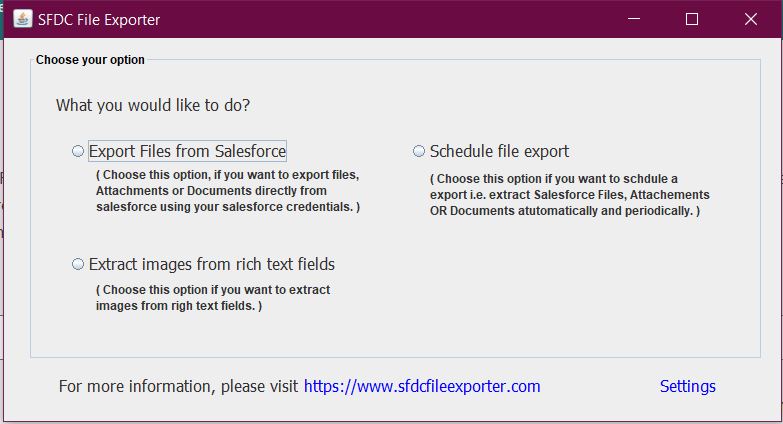
Log in to Salesforce
The login window will open. Enter your Salesforce credentials and click Sign In.
Configure export settings
After logging in, the export configuration screen opens. Each numbered section (marked in red) is described below:
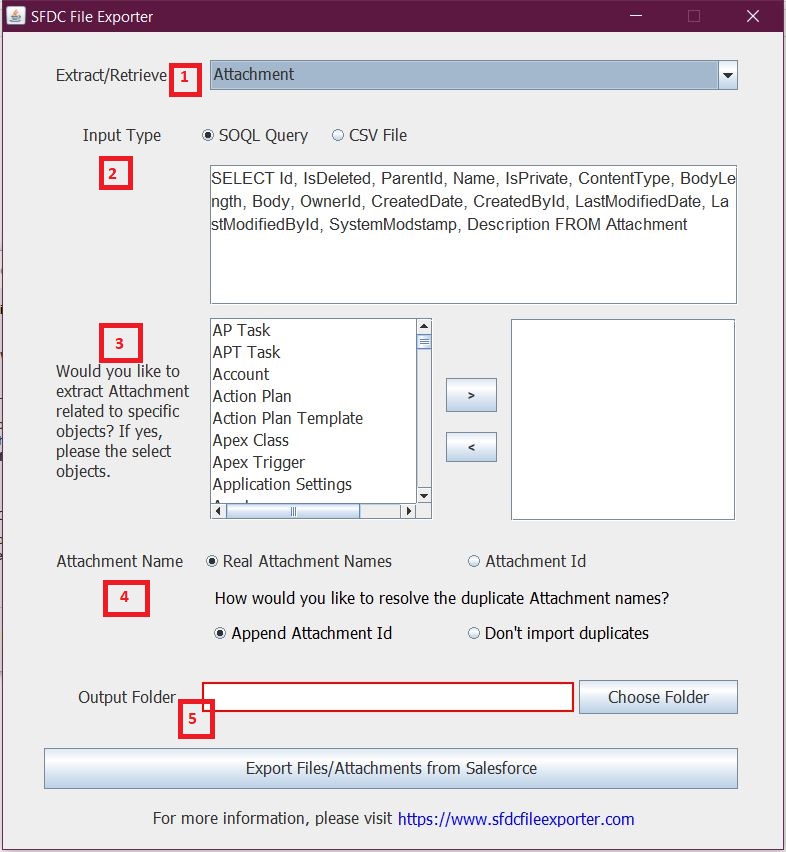
- Choose whether you want to export Attachments, Salesforce Files, Documents, or Static Resources.
- Choose input type as SOQL Query (selected by default).
- Choose the Salesforce object from which to extract files (available for Attachments and Salesforce Files only).
- Choose the file naming format. By default, Real attachment names is selected (e.g. abc.docx, report.pdf). Alternatively, choose Attachment Id to match Salesforce's Data Export format. Also specify how to handle duplicates — by default, the app appends the attachment ID.
- Choose the output folder on your local machine where exported files will be saved.
Start the export
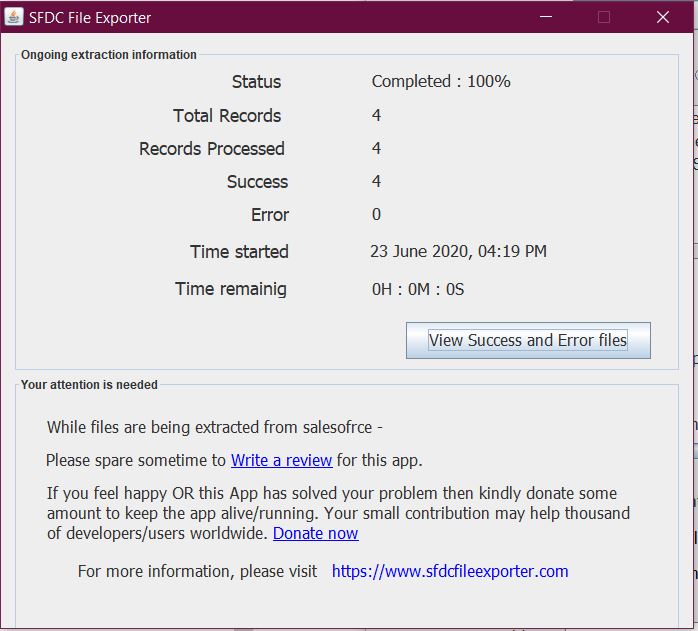
Click Export Files/Attachments from Salesforce. A popup will display the ongoing extraction status.
Extract Files Using CSV File
All steps are the same as Export via SOQL Query except for the input type selection (item 2 in the configuration screen).
Select CSV File as the input type, then click Choose File and select your CSV file.
- Exporting Attachments → first column must be Attachment Id
- Exporting Salesforce Files → first column must be Content Document Id
- Exporting Documents → first column must be Document Id
- Exporting Static Resources → first column must be Static Resource Id
An exception will be thrown if the column name does not match exactly.
After filling in all required fields, click Export Files/Attachments from Salesforce to start the export.
How to Add a Where Clause
For object-based extractions, you can filter results by adding a WHERE clause to narrow down which files are exported. Enter the condition (without the keyword WHERE) in the filter field before starting the export.
Examples:
Ongoing Extraction Status Information
Once the export starts, SFDC File Exporter displays a real-time status popup showing:
- Total files queued for export
- Files successfully downloaded
- Files failed or skipped
- Current file being downloaded
- Overall progress percentage
Do not close the application while extraction is in progress. The output folder will fill with files as the export runs.
Schedule SFDC File Exporter
You can automate exports to run at a set time using Windows Task Scheduler alongside the SFDC File Exporter scheduler component.
Choose "Schedule file export"
Run SFDC File Exporter by clicking the shortcut icon or the .exe file. On the main screen, click Schedule file export (marked in red).
Enter scheduler settings
The scheduler settings window will open. Fill in each numbered field:
- Enter the Salesforce instance URL (sandbox, production, or developer).
- Enter your Salesforce username.
- Enter your Salesforce password.
- Choose the output folder where exported files will be stored.
- Enter an email address to be notified if an exception occurs during extraction.
- Choose when to delete older logs generated during extraction.
- Choose the Salesforce object to extract files from.
- Choose input type: SOQL or CSV.
- Choose the file naming format. If unsure, leave as default.
Save scheduler settings
Click Save Scheduler Settings. You will receive a confirmation message. Note: if settings are not saved successfully, the scheduler will not run.
Open Windows Task Scheduler
Search for Task Scheduler in the Windows search bar and open it (run as Administrator).
Create a new task
Click Create Task. Enter Schedule SFDC File Exporter in the Name field.
Click the Trigger tab and choose Daily (or your preferred frequency).
Then click the Action tab. Click Browse and select sfdcfileexporterschedular.exe. This file is included in the downloaded zip alongside sfdcfileexporter_v1.exe.
Click OK to save the Task Scheduler entry.
Test the scheduler
Click Active Tasks and select Schedule SFDC File Exporter.
Click the Run button and verify that files are being created in the output folder you selected in Step 2.
If files are appearing in the output folder, you have successfully scheduled SFDC File Exporter.
How to Change Product Key
To transfer your license to a different machine or update your key:
- Open SFDC File Exporter and go to Settings → Change Product Key.
- Enter the new product key in the provided field.
- Click Update. The previous key will be deactivated on this machine.
How to Generate Your Security Token
If the login screen asks for a Security Token, your IP address is not on Salesforce's trusted IP list. Follow the dedicated guide to reset and retrieve your token:
Security Token Guide →